Verify a Smart Contract using the Rootstock Explorer
Contract verification is essential in the Rootstock ecosystem. It allows Rootstock Explorer users to inspect and validate the source code of deployed smart contracts.
The Rootstock Explorer provides a transparent view of the Rootstock blockchain, showing transactions, blocks, and deployed contracts. This transparency, enabled by verification, builds trust and understanding in decentralized applications.
Key reasons for verifying a smart contract
- Builds trust:
- Verification allows anyone to see the source code of a deployed smart contract, which fosters trust with users and the community.
- Increases transparency:
- Users can audit the code to confirm it performs the actions it claims to, providing confidence in the contract's operations.
- Aids in security:
- By making the code public, it can be reviewed for vulnerabilities, though users should still conduct their own security assessments.
- Enables proper tooling:
- Many development and analysis tools, such as those from Tenderly, require the contract's source code to be verified to function correctly.
- Provides public interaction:
- Verification allows users to interact with the contract through block explorers like Etherscan, even if other user interfaces are unavailable.
- Confirms code integrity:
- The verification process proves that the bytecode on the blockchain was generated from a specific, known source code, ensuring the contract hasn't been tampered with.
- Helps with compliance:
- Verification is essential for meeting certain compliance and regulatory requirements.
What does verification do?:
- Adds a Verified badge to the contract page, confirming that the published source code matches the deployed bytecode.
- Enables human-readable interaction with the contract — allowing users to view and call its functions directly.
- Allows downloading the contract's Application Binary Interface (ABI).
Prerequisites
- Address of the deployed contract on Rootstock.
- Complete source code of the contract.
- Compiler details:
- Solc (Solidity Compiler) version.
- Number of optimization runs.
- Constructor parameters (if applicable).
- Library addresses (if used).
In summary, this guide will help you verify your smart contract, allowing you to leverage these benefits and contribute to a more transparent and trustworthy decentralized environment on Rootstock.
Getting Started
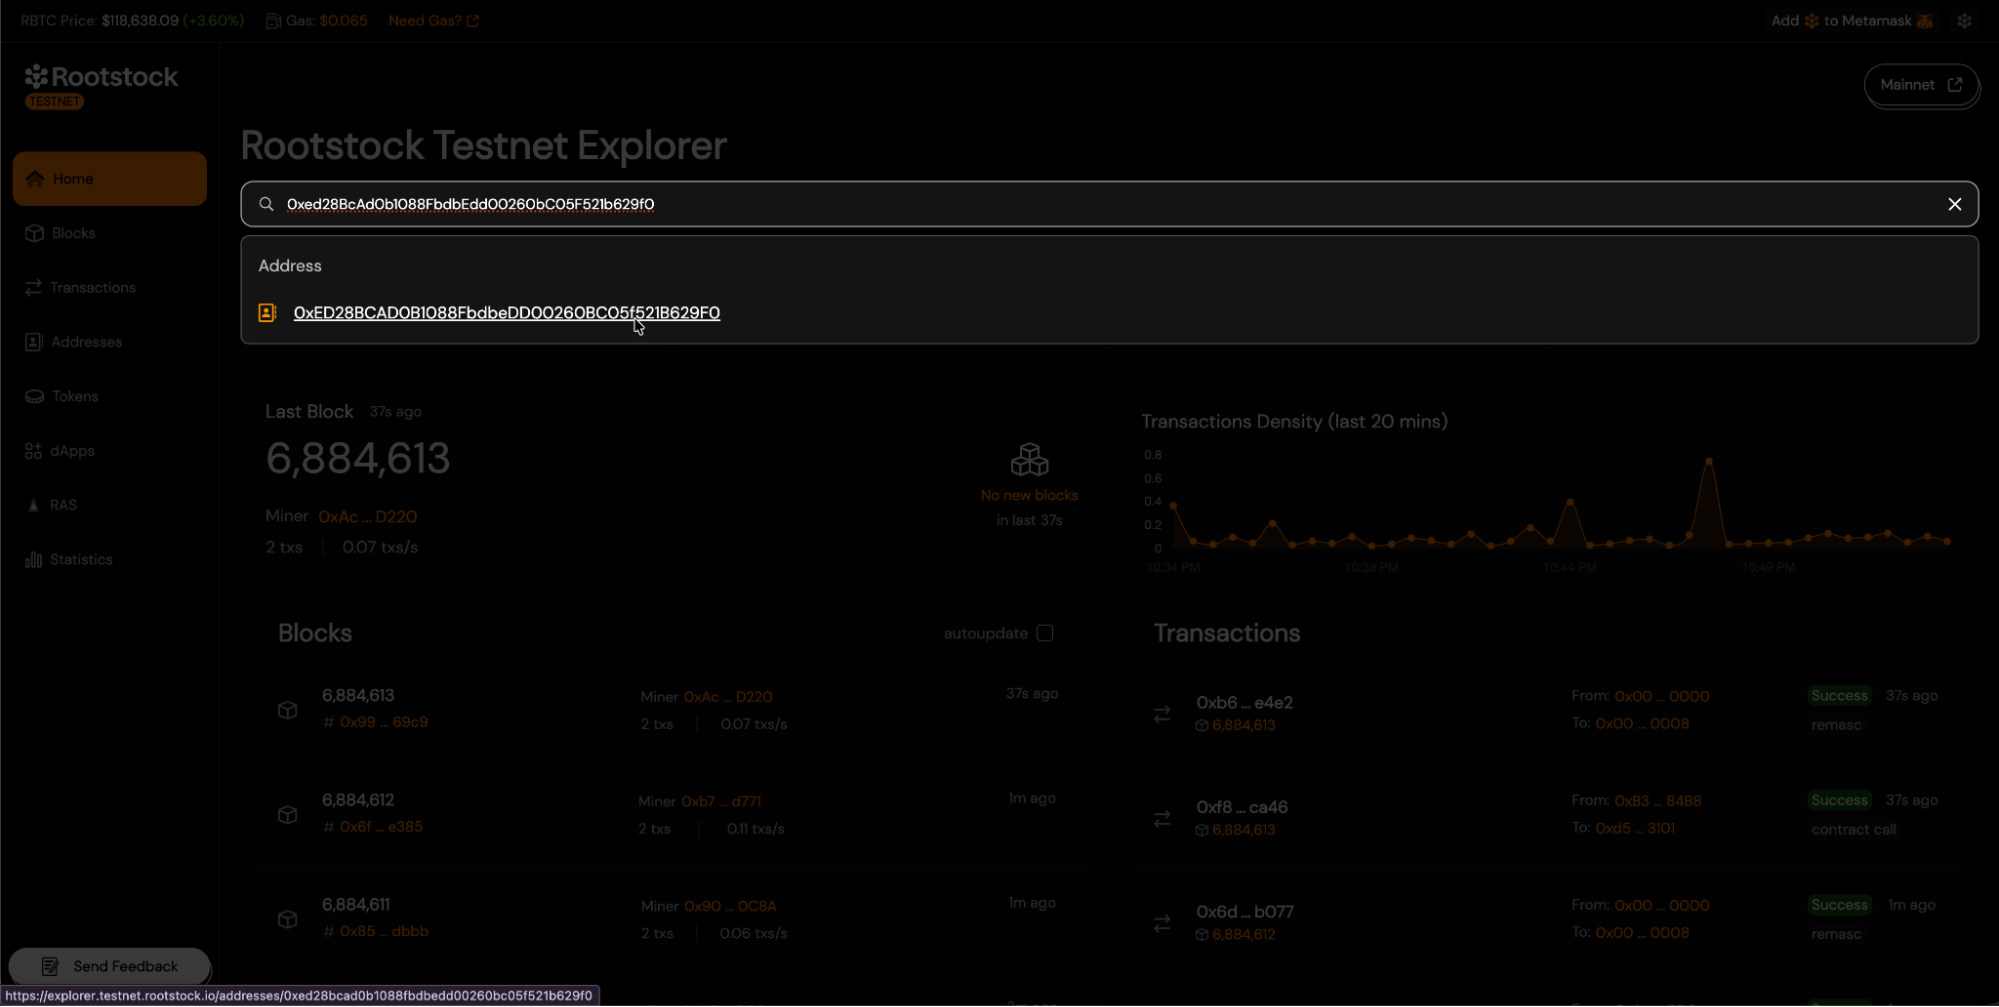
- To start the verification process, visit the Rootstock Explorer Testnet or Rootstock Explorer Mainnet, and find your contract using the search field.
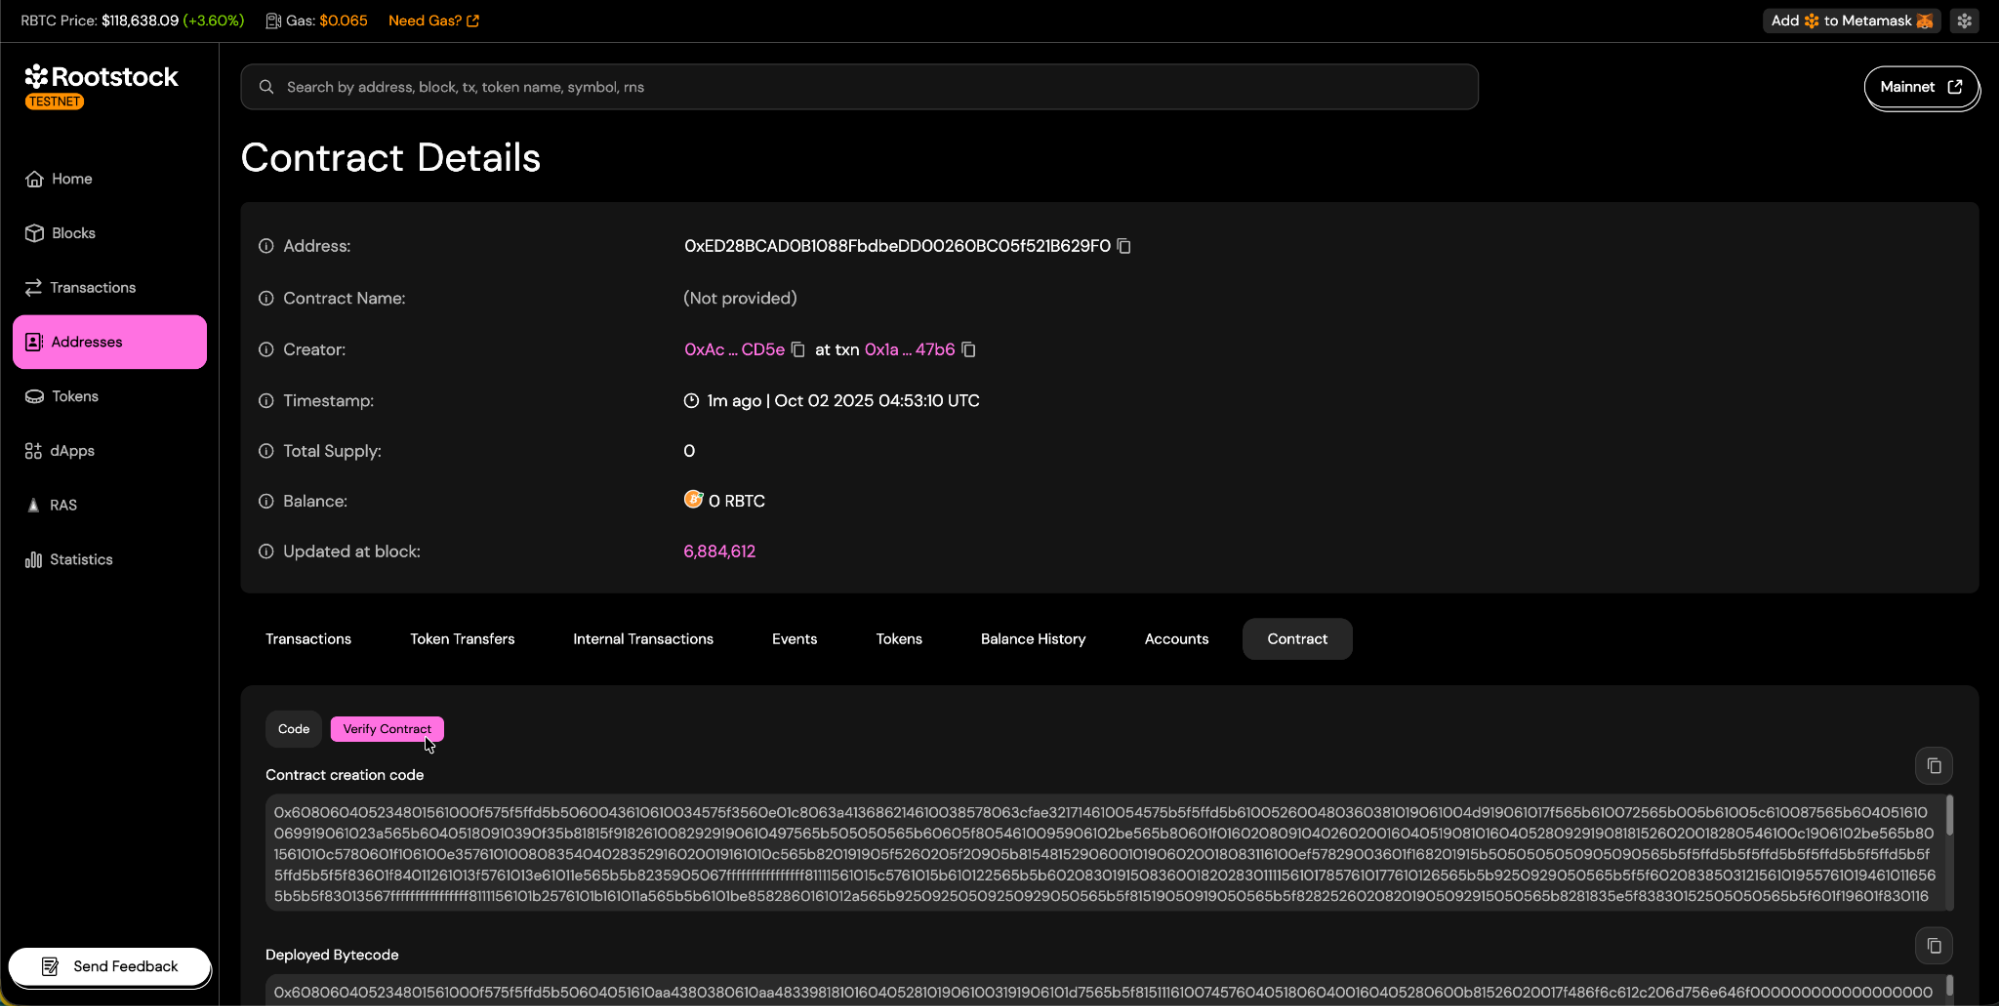
- Once you reach your contract's address view, navigate to the "Contract" tab and click the "Verify Contract" button.
Choosing a Verification Method
Rootstock Explorer offers two main methods for contract verification:
1. Single File (Flattened)
- This method is for when the smart contract is contained within a single
.solfile and does not rely on complex imports or libraries that would make verification difficult.
Example:
This is a simple contract in a single file:
  // SPDX-License-Identifier: MIT
  pragma solidity ^0.8.24;

  contract Greeter {
      string private _greeting = "Hello world";

      function greet() external view returns (string memory) {
          return _greeting;
      }

      function setGreeting(string calldata newGreeting) external {
          _greeting = newGreeting;
      }
  }
How to use:
- Select the Solidity Source File option.
- Upload the single
.solfile that contains the contract's code. - Continue with the verification.

2. Multiple Files / Standard JSON
- This is the preferred method when the contract is part of a larger project, uses multiple Solidity files (including imports), or is compiled using a development framework like Hardhat, Truffle, or Foundry.
- These frameworks generate a specific output format called the "Standard JSON Input", which contains all necessary files, settings, and metadata for a complete and precise compilation/verification.
Example:
If a utility library exists and is used in the contract:
// SPDX-License-Identifier: MIT
pragma solidity ^0.8.24;

library Utils {
    /// @notice Convert text to uppercase
    function toUpper(string memory str)
        internal
        pure
        returns (string memory)
    {
        bytes memory b = bytes(str);
        for (uint256 i = 0; i < b.length; i++) {
            if (b[i] >= 0x61 && b[i] <= 0x7A) {
                b[i] = bytes1(uint8(b[i]) - 32);
            }
        }
        return string(b);
    }
    /// @notice Returns the length of the text
    function lengthOf(string memory str)
        internal
        pure
        returns (uint256)
    {
        return bytes(str).length;
    }
}
Import the library into your contract:
// SPDX-License-Identifier: MIT
pragma solidity ^0.8.24;

import "./libraries/Utils.sol";

contract Greeter {
    using Utils for *;

    string private _greeting = "hello";

    function greet() external view returns (string memory) {
        return Utils.toUpper(_greeting);
    }

    function messageLength() external view returns (uint256) {
        return Utils.lengthOf(_greeting);
    }

    function setGreeting(string calldata newGreeting) external {
        _greeting = newGreeting;
    }
}
Proyect structure:
contracts/
 ├── Greeter.sol
 └── libraries/
      └── Utils.sol
Compile:
After compiling the project using a development framework, a file like this is generated.
{
  "language": "Solidity",
  "sources": {
    "contracts/Greeter.sol": {
      "content": "// SPDX-License-Identifier: MIT\npragma solidity ^0.8.24;\nimport './libraries/Utils.sol';\ncontract Greeter { ... }"
    },
    "contracts/libraries/Utils.sol": {
      "content": "// SPDX-License-Identifier: MIT\npragma solidity ^0.8.24;\nlibrary Utils { ... }"
    }
  },
  "settings": {
    "optimizer": {
      "enabled": true,
      "runs": 200
    },
    "outputSelection": {
      "*": {
        "*": [
          "abi",
          "evm.bytecode",
          "evm.deployedBytecode",
          "metadata"
        ]
      }
    }
  }
}
How to use:
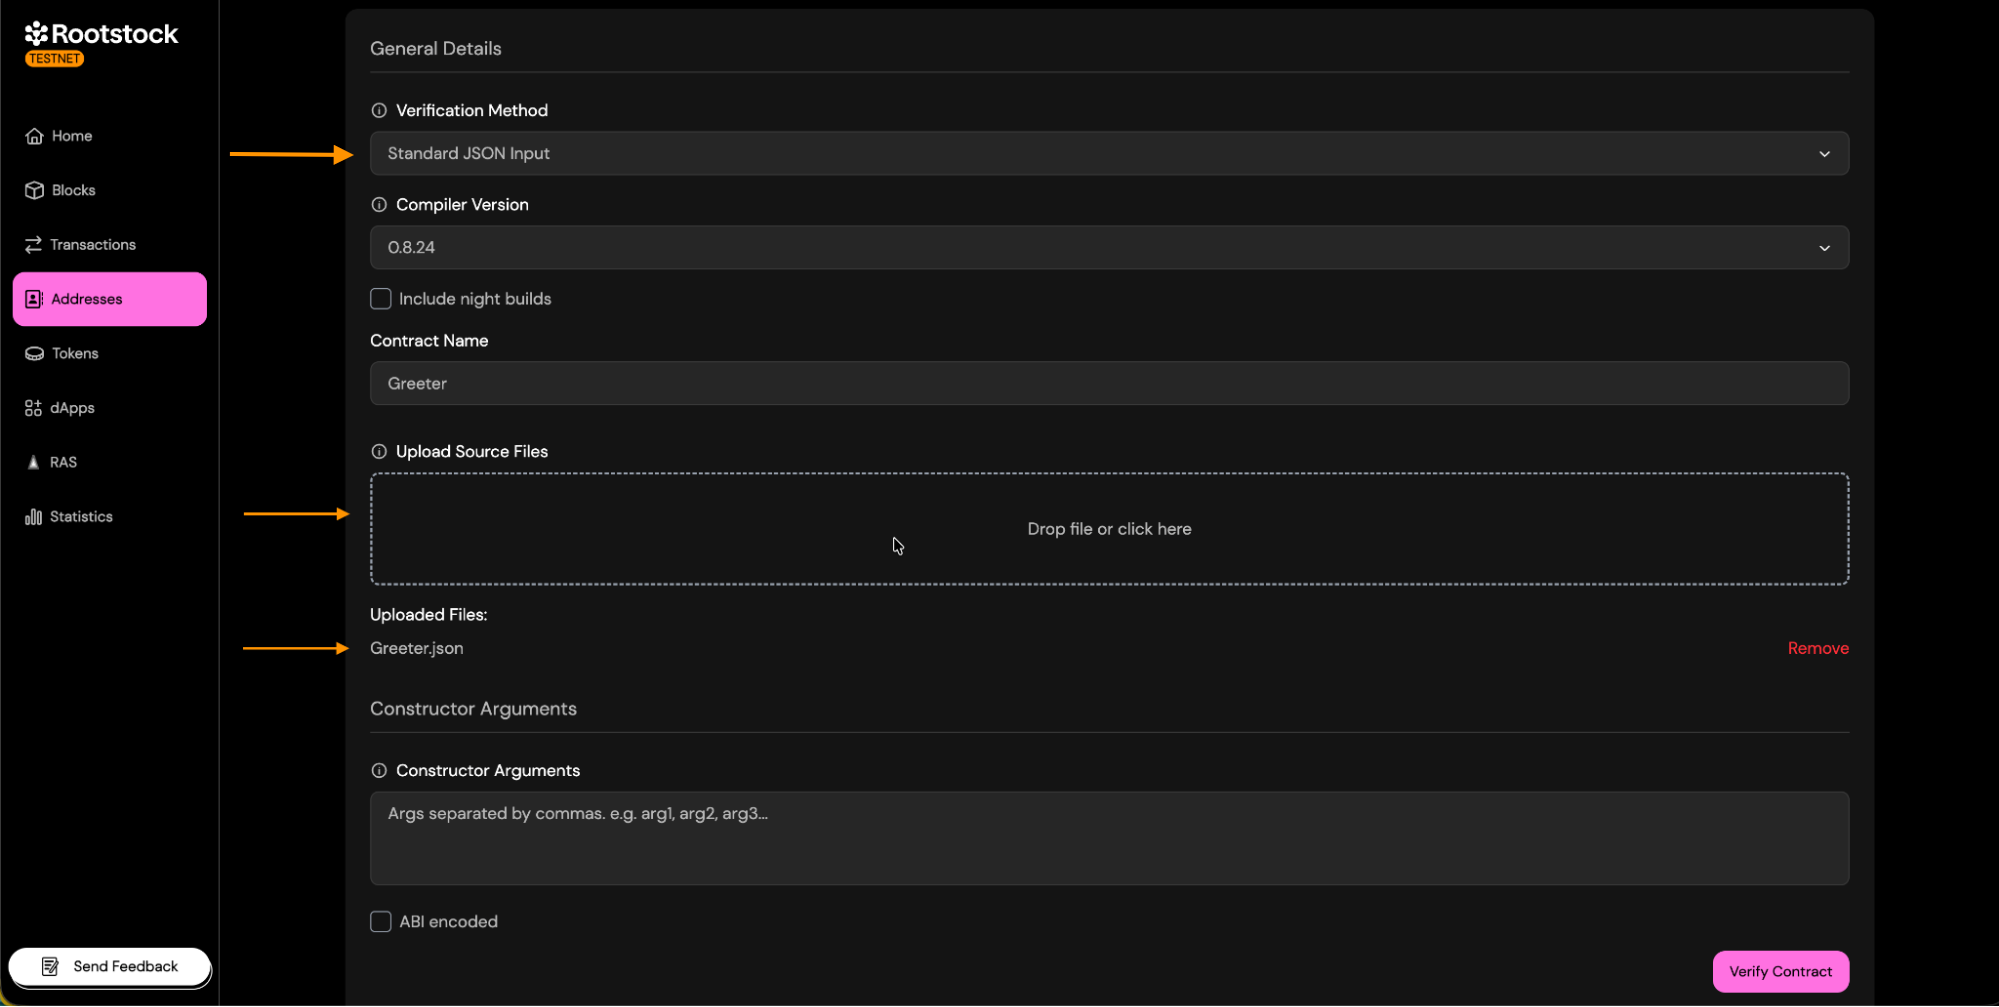
- Select the Standard JSON Input option.
- Upload the
.jsonfile that contains the contract's code. - Continue with the verification.
When to use:
| Verification Method | Usage | Pros | Cons |
|---|---|---|---|
| Single File (Flattened) | Small contracts, without complex imports or libraries. | Easy and fast for simple contracts. | Can be tedious to flatten large contracts or those with many dependencies. |
| Multiple Files / Standard JSON | Large projects, with dependencies, libraries, or generated by development frameworks. | Automatically handles imports and dependencies. | Requires exporting the Standard JSON file from your development environment. |
Compiler Configuration
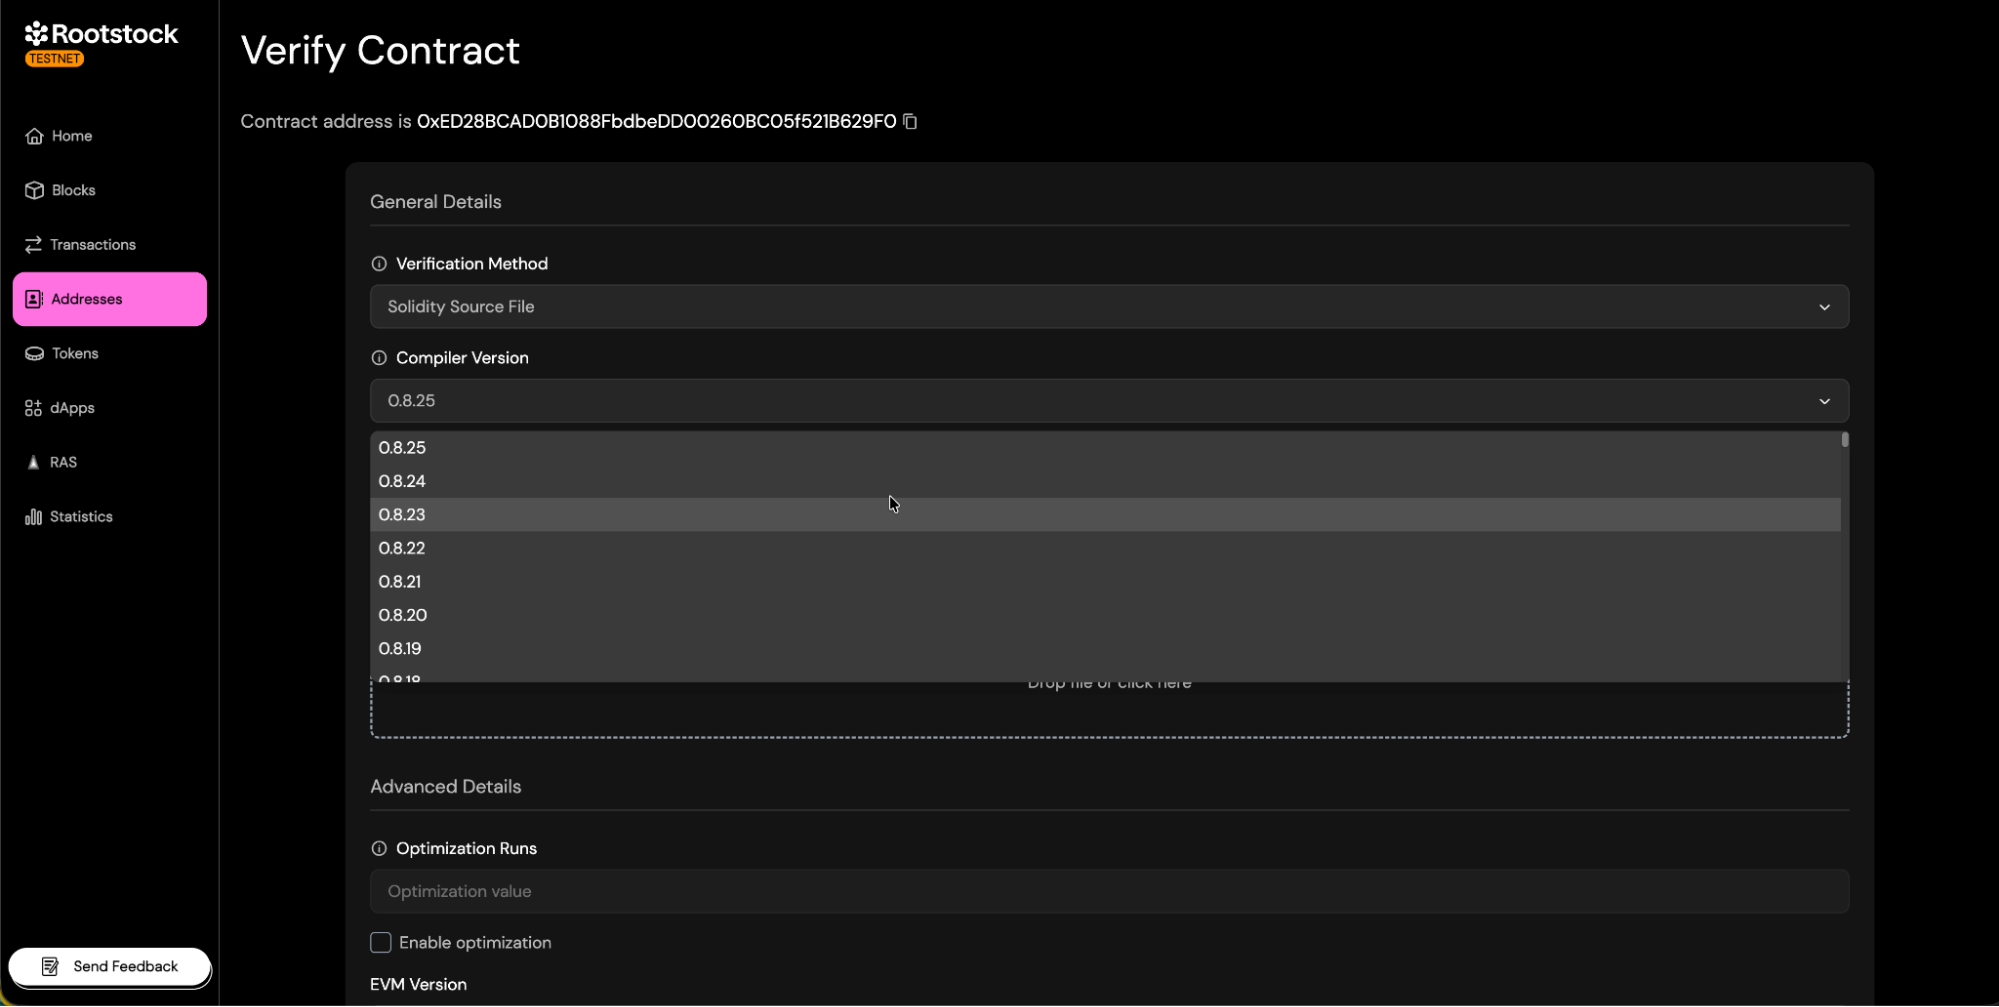
Ensure that the compiler configuration in the explorer matches that used during the compilation of your contract.
- Select Solc version: Choose the Solc version you used to compile your contract.
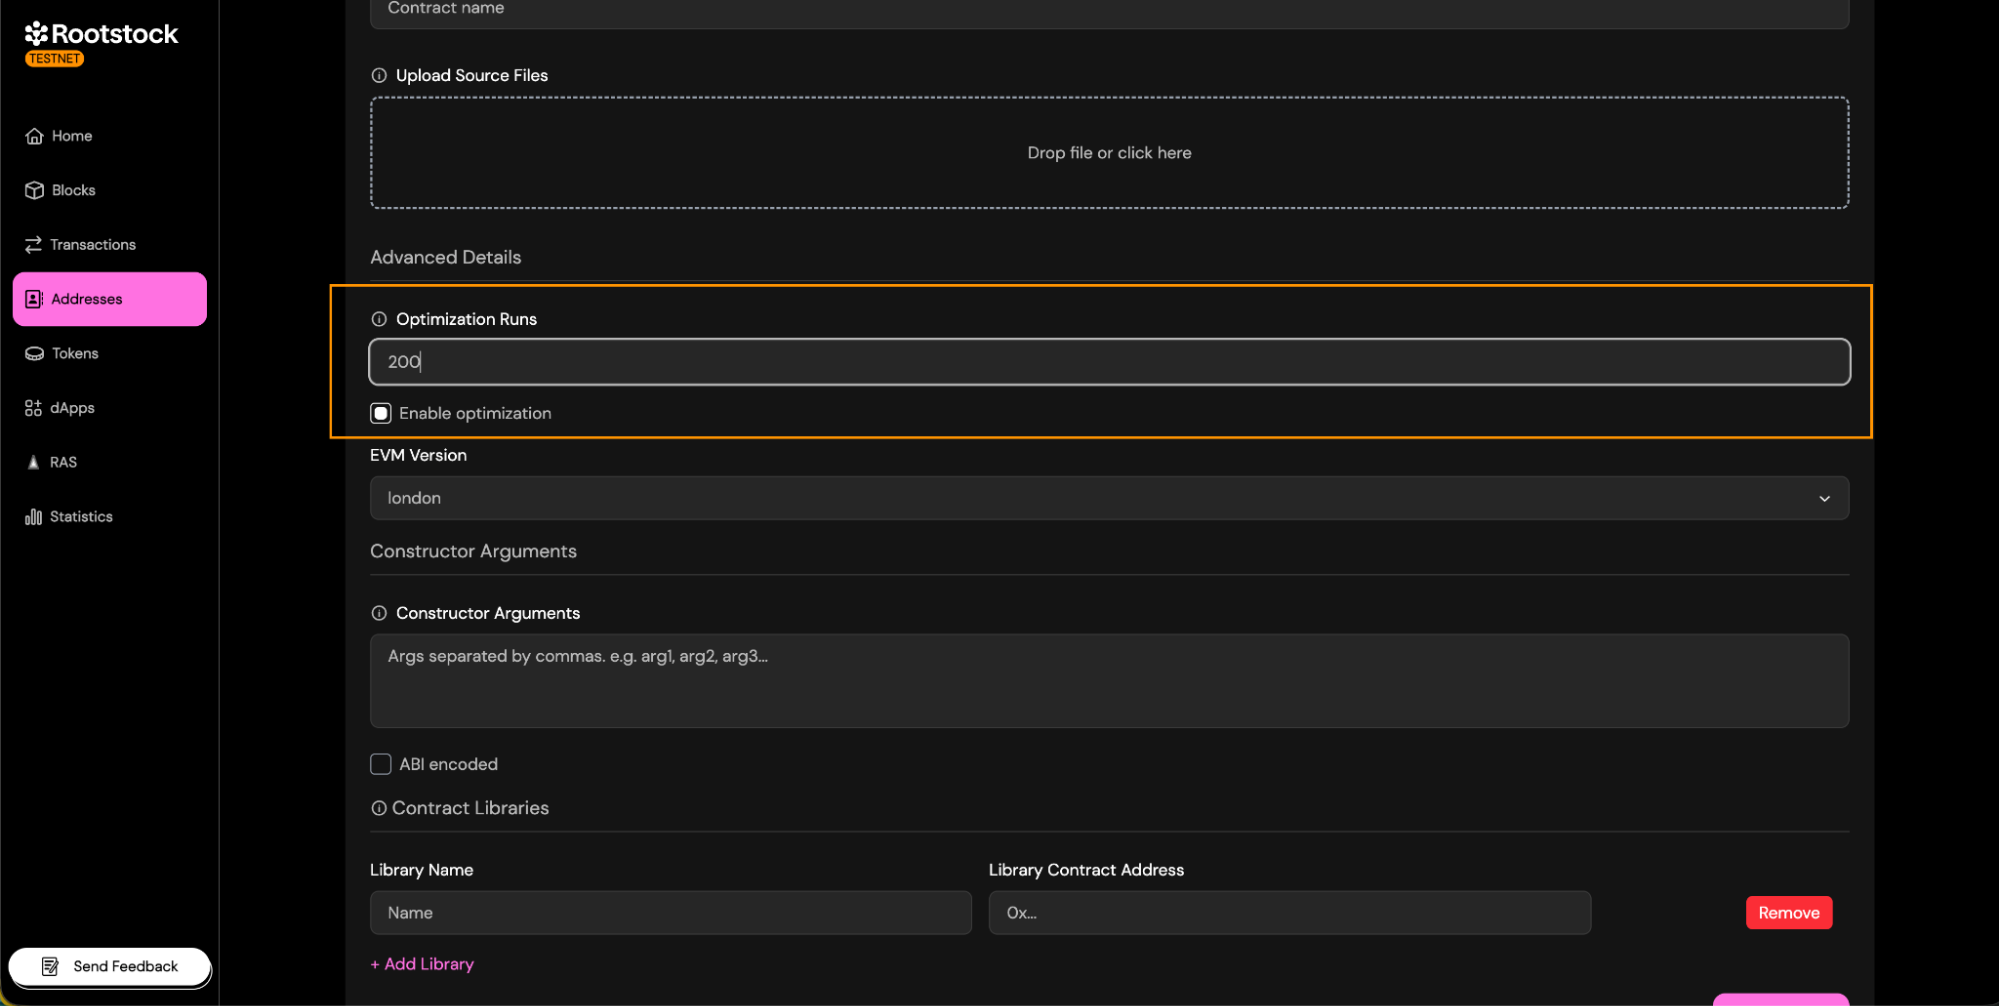
- Optimization:
- If you used optimization run when compiling/deploying, enable it during verification and set the same runs (default 200).
- If you didn’t use optimization, leave it disabled and don’t enter any runs.
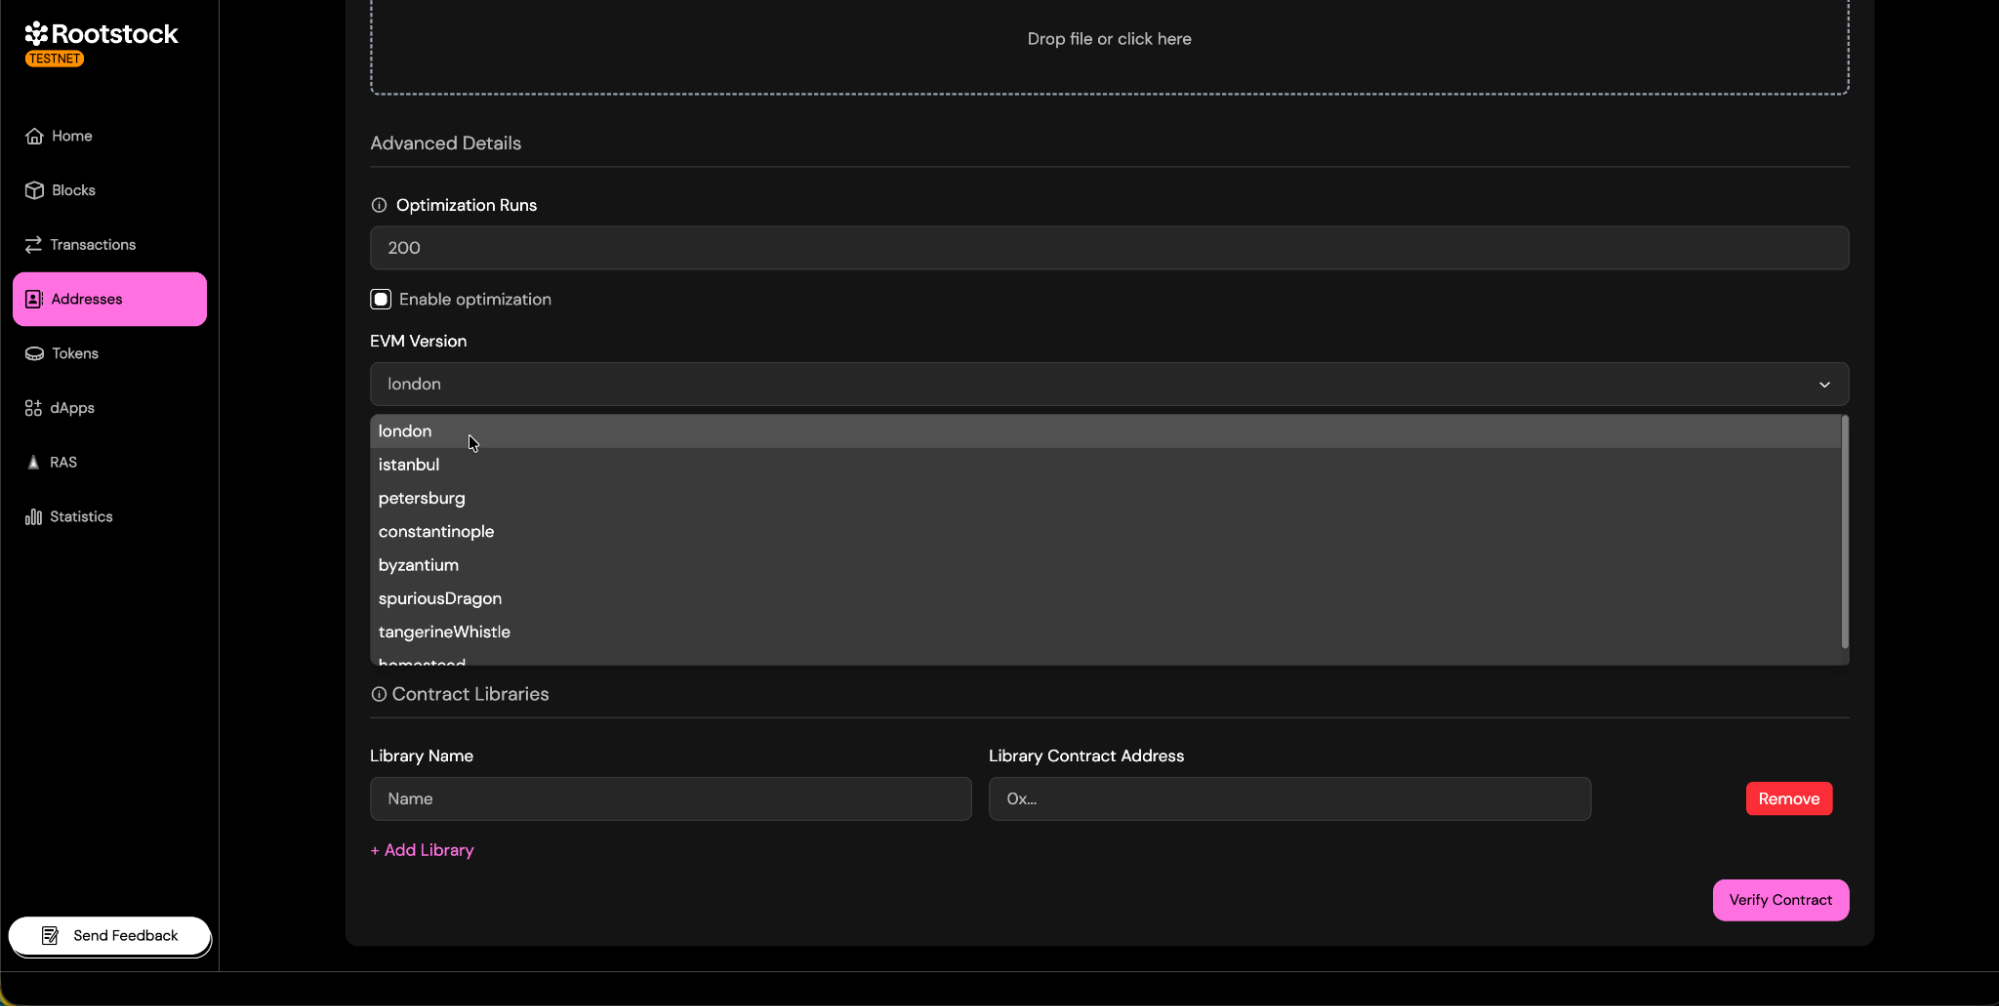
- EVM Version: Choose the appropriate EVM version.
Source Code Input
Provide the contract's source code.
-
Contract Name:
- Enter the exact name of the contract deployed. This is required so the verifier can match the correct bytecode.
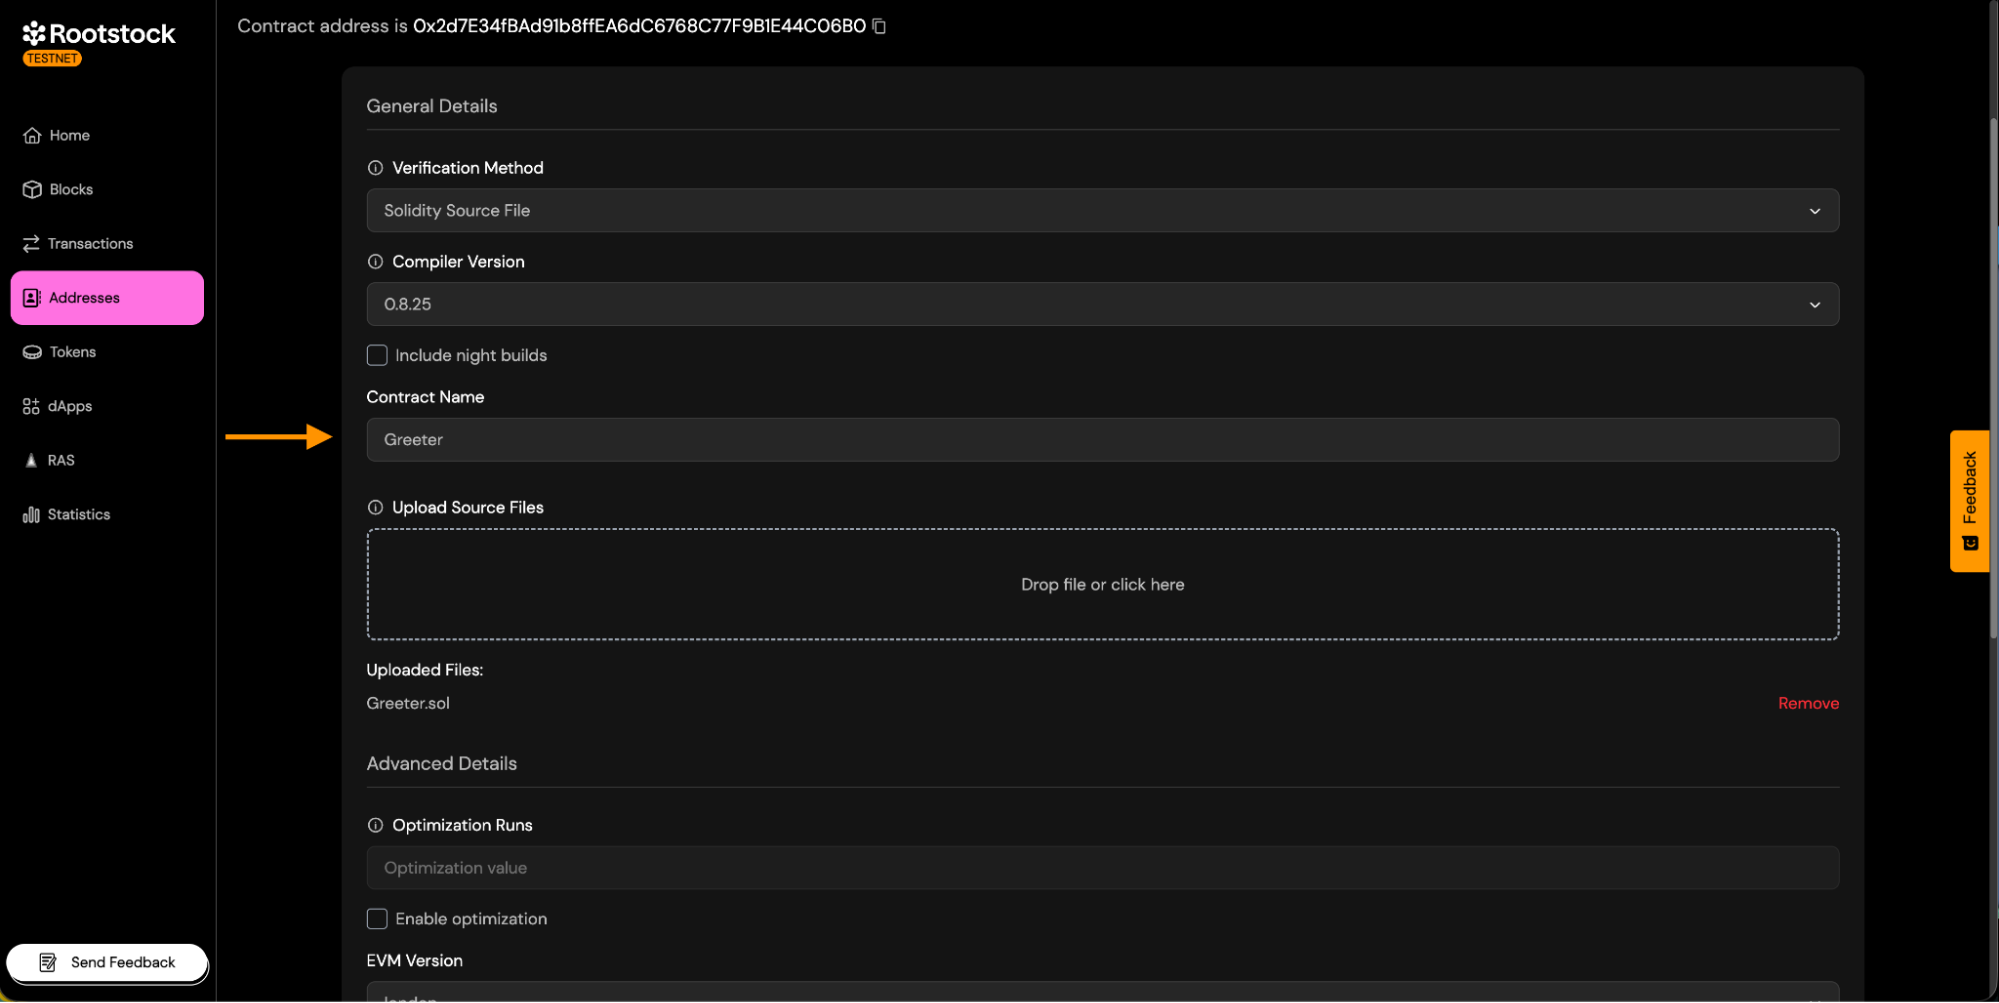
- Enter the exact name of the contract deployed. This is required so the verifier can match the correct bytecode.
-
Paste/Upload source code:
- Single File: upload the .sol file.

- Standard JSON: Upload the standard-json file generated by your development framework.
- Single File: upload the .sol file.
-
Constructor Arguments: Enter the constructor arguments separated by comma if more than one.
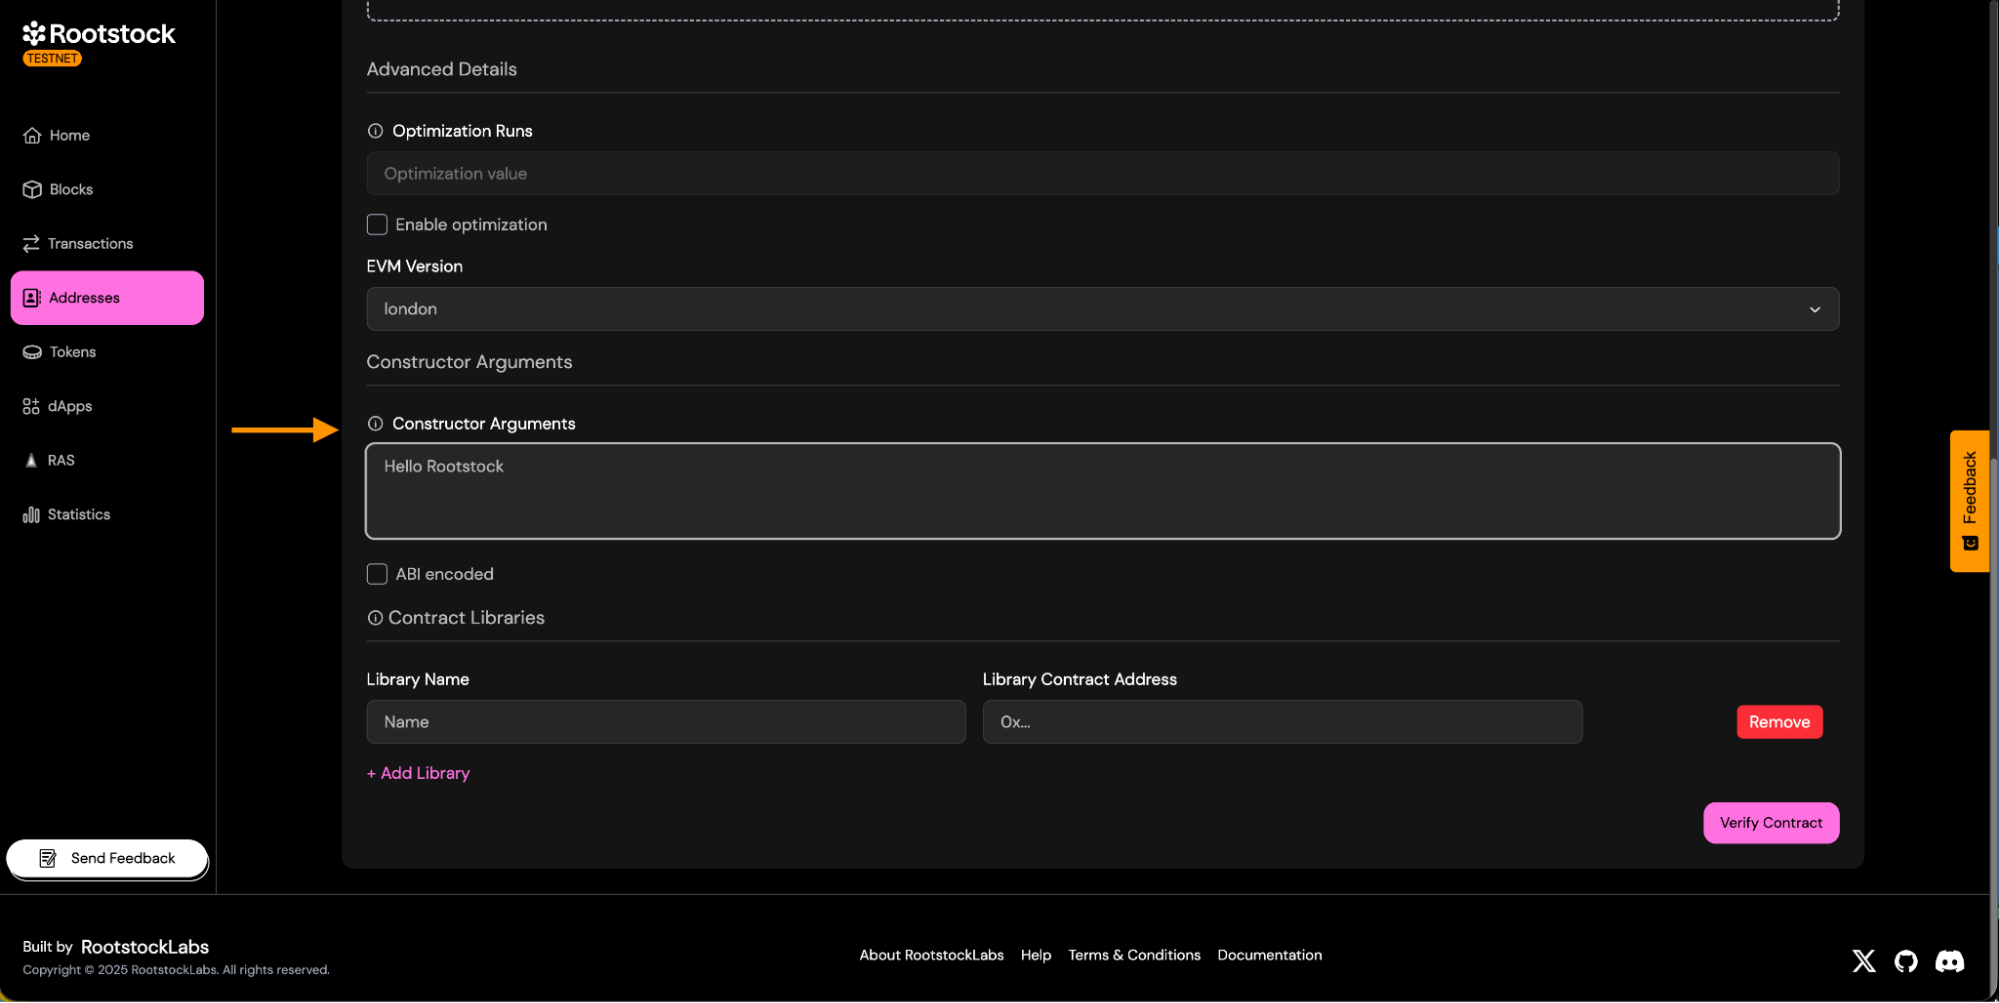
-
Libraries:
- If your contract uses libraries, provide its name and deployed addresses.
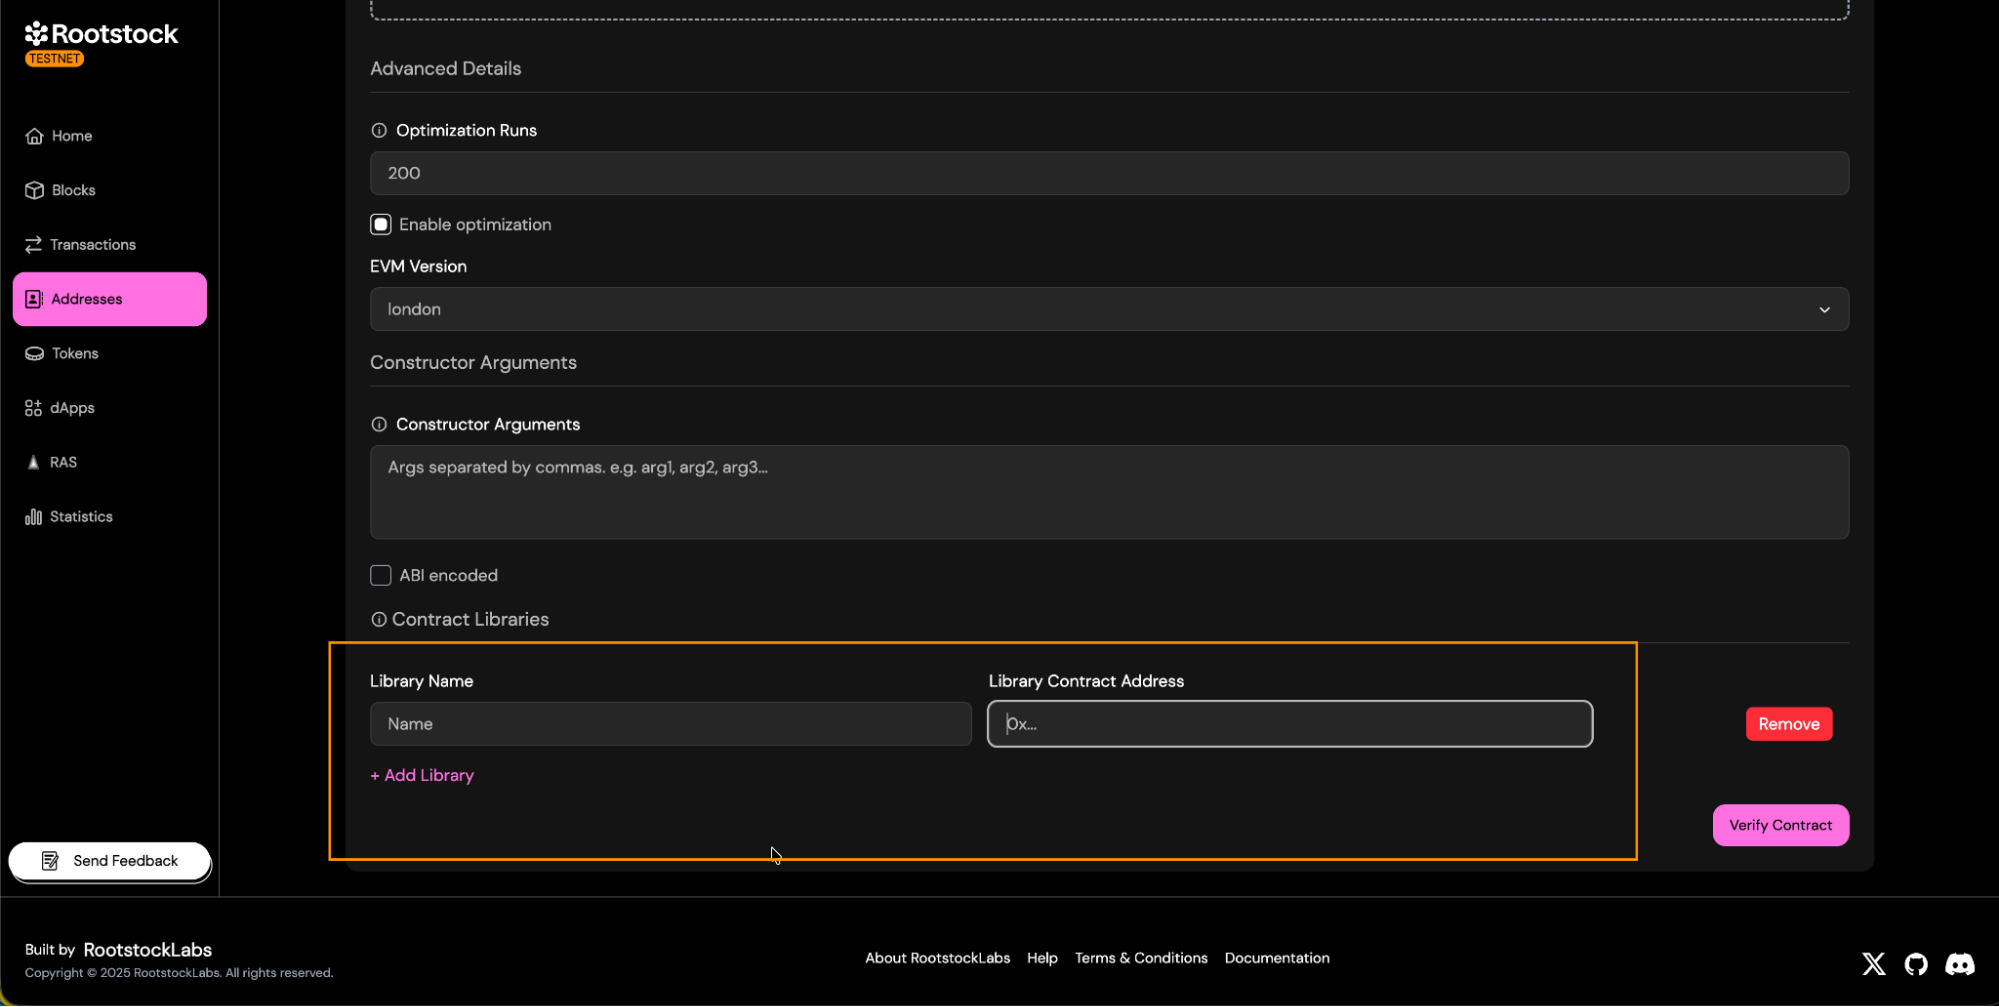
- If your contract uses libraries, provide its name and deployed addresses.
Submit and Validate
Once you have entered all the details, click "Verify Contract".
-
Expected statuses: The verification status will change from "Pending" to "Success" or "Failure".
-
On successful status:
a. You will see the
Verifiedbadge on the contract page.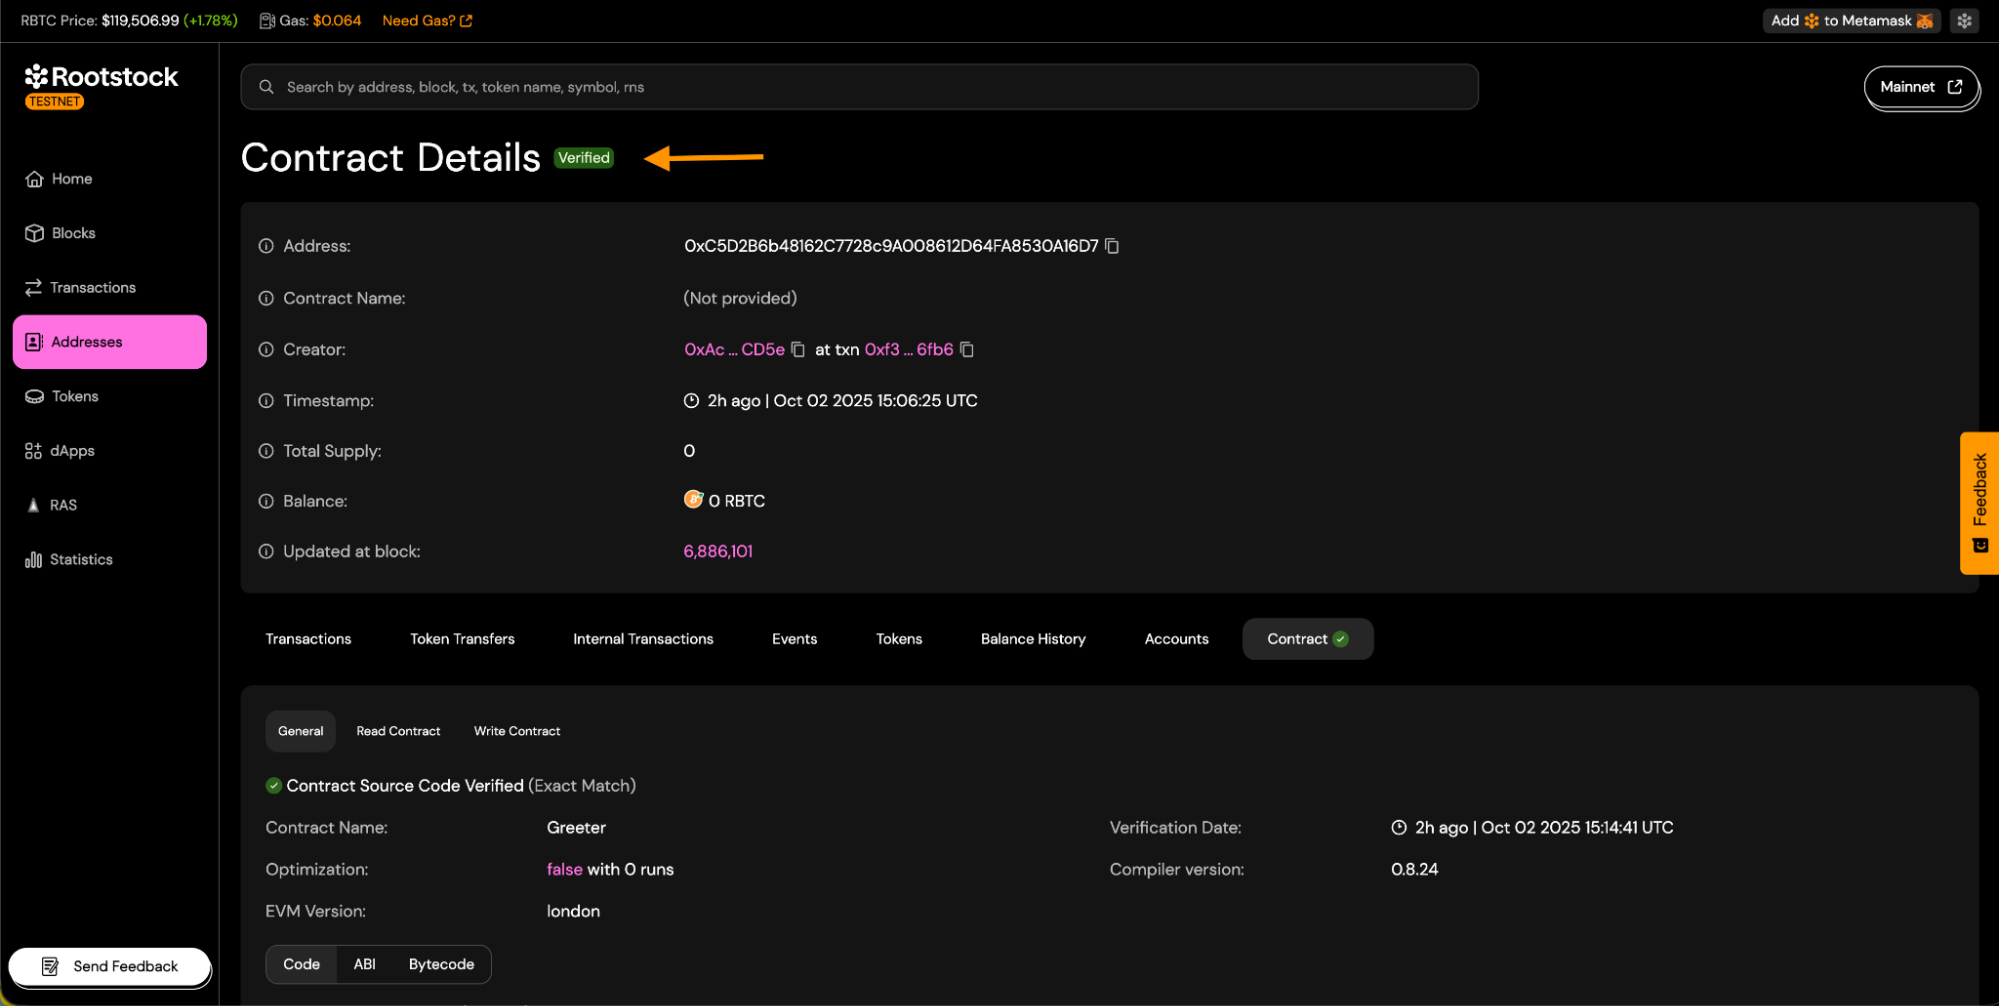
b. Source code tabs will be visible.
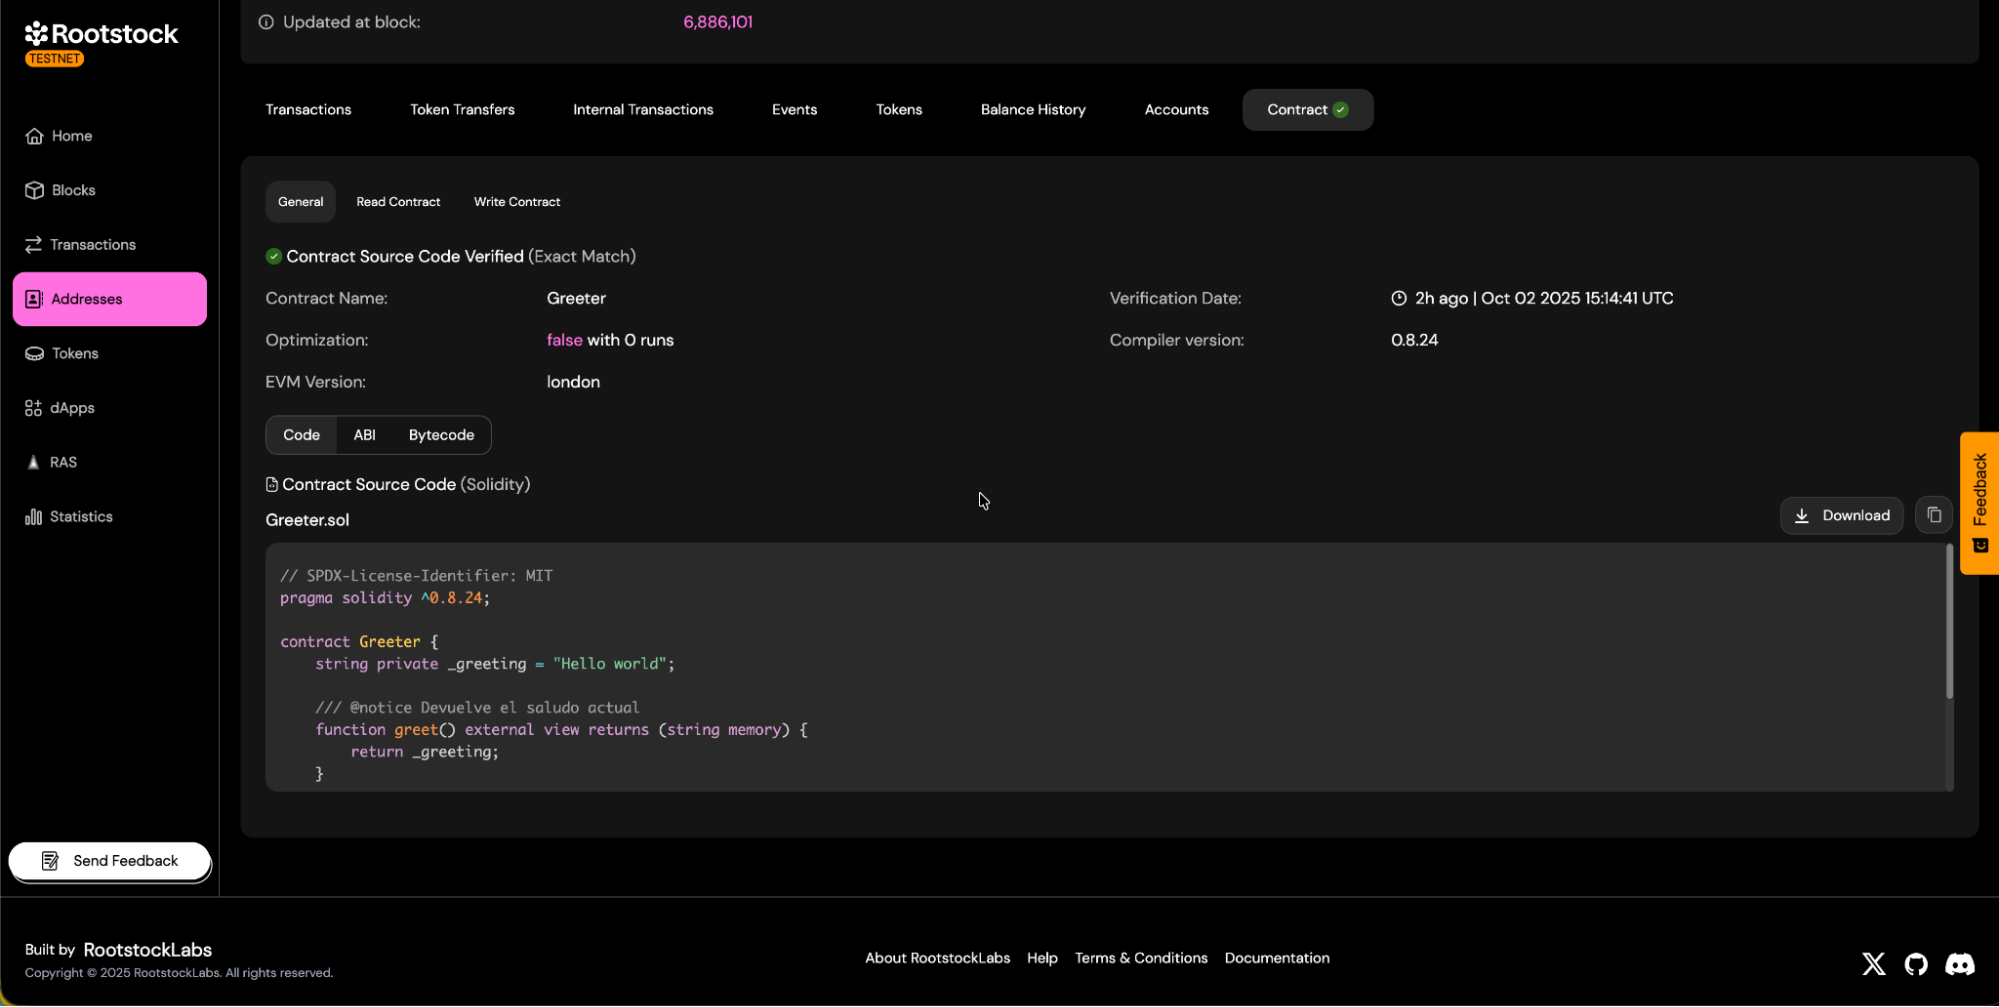
c. You will be able to download the contract ABI.
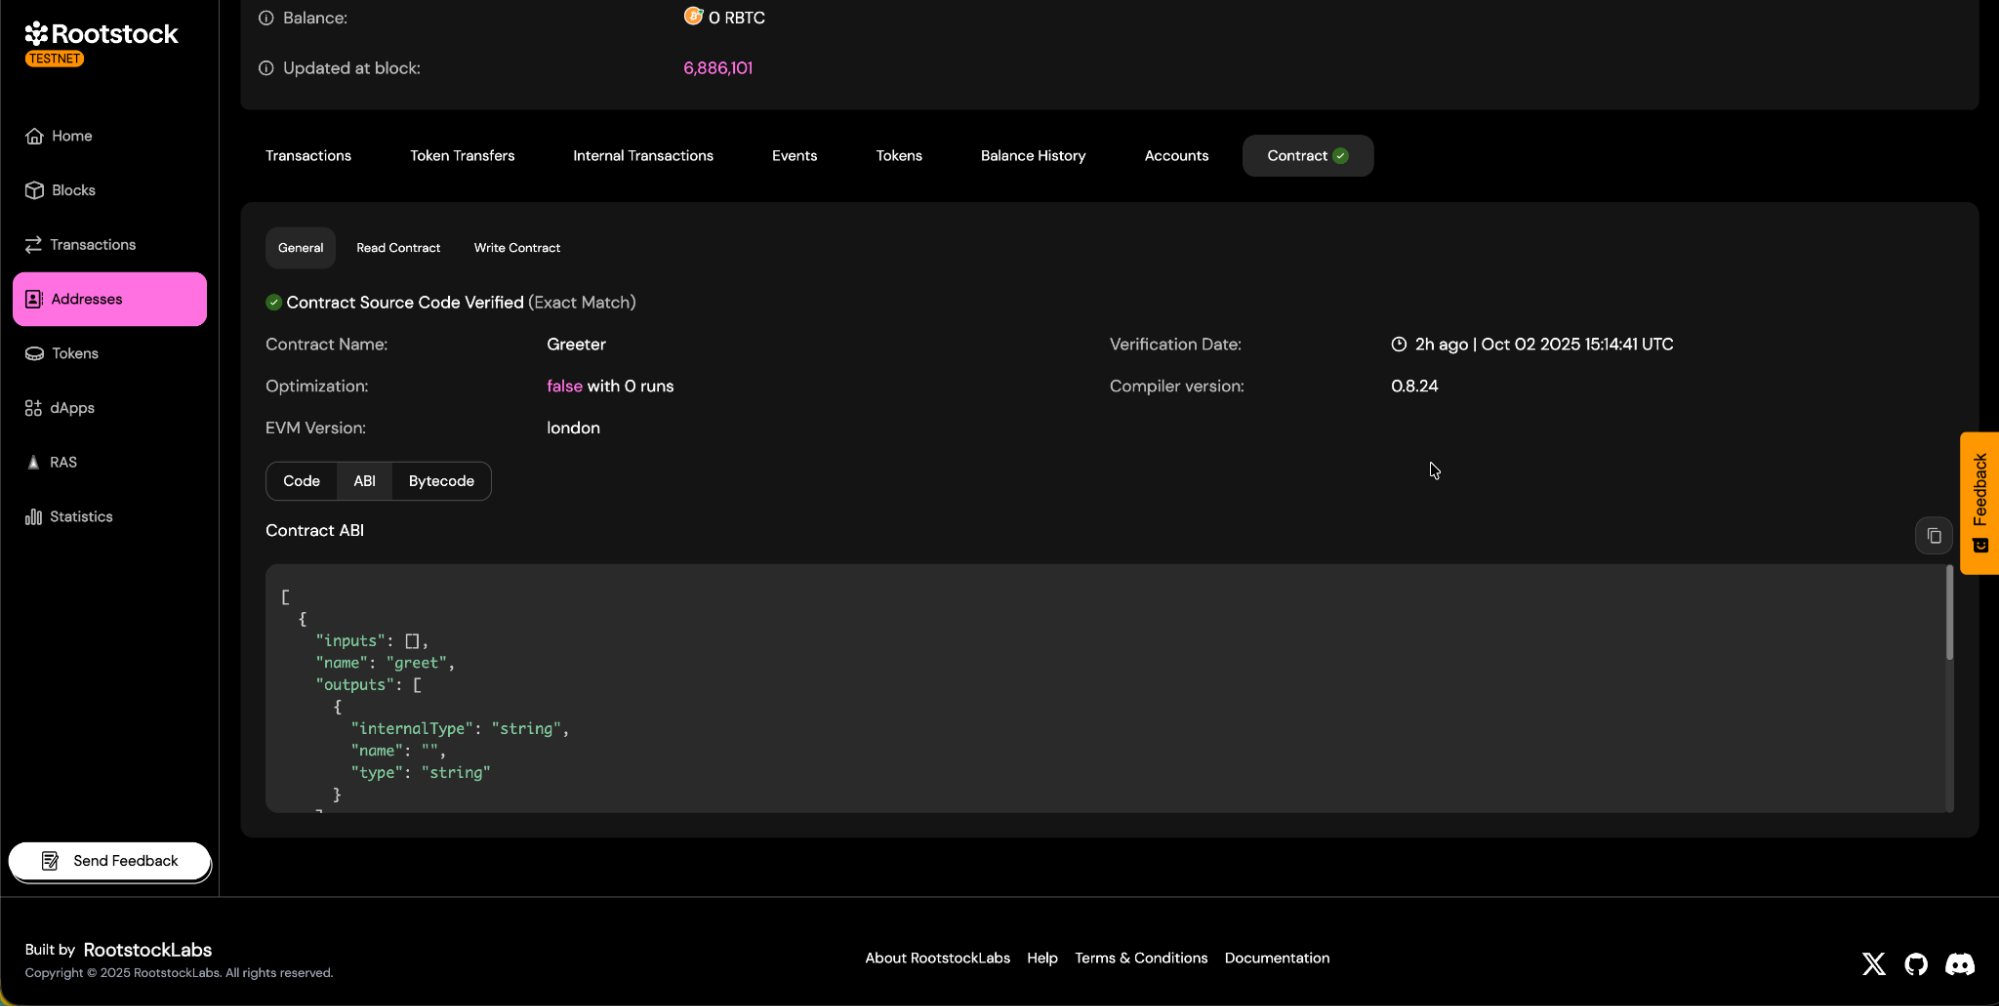
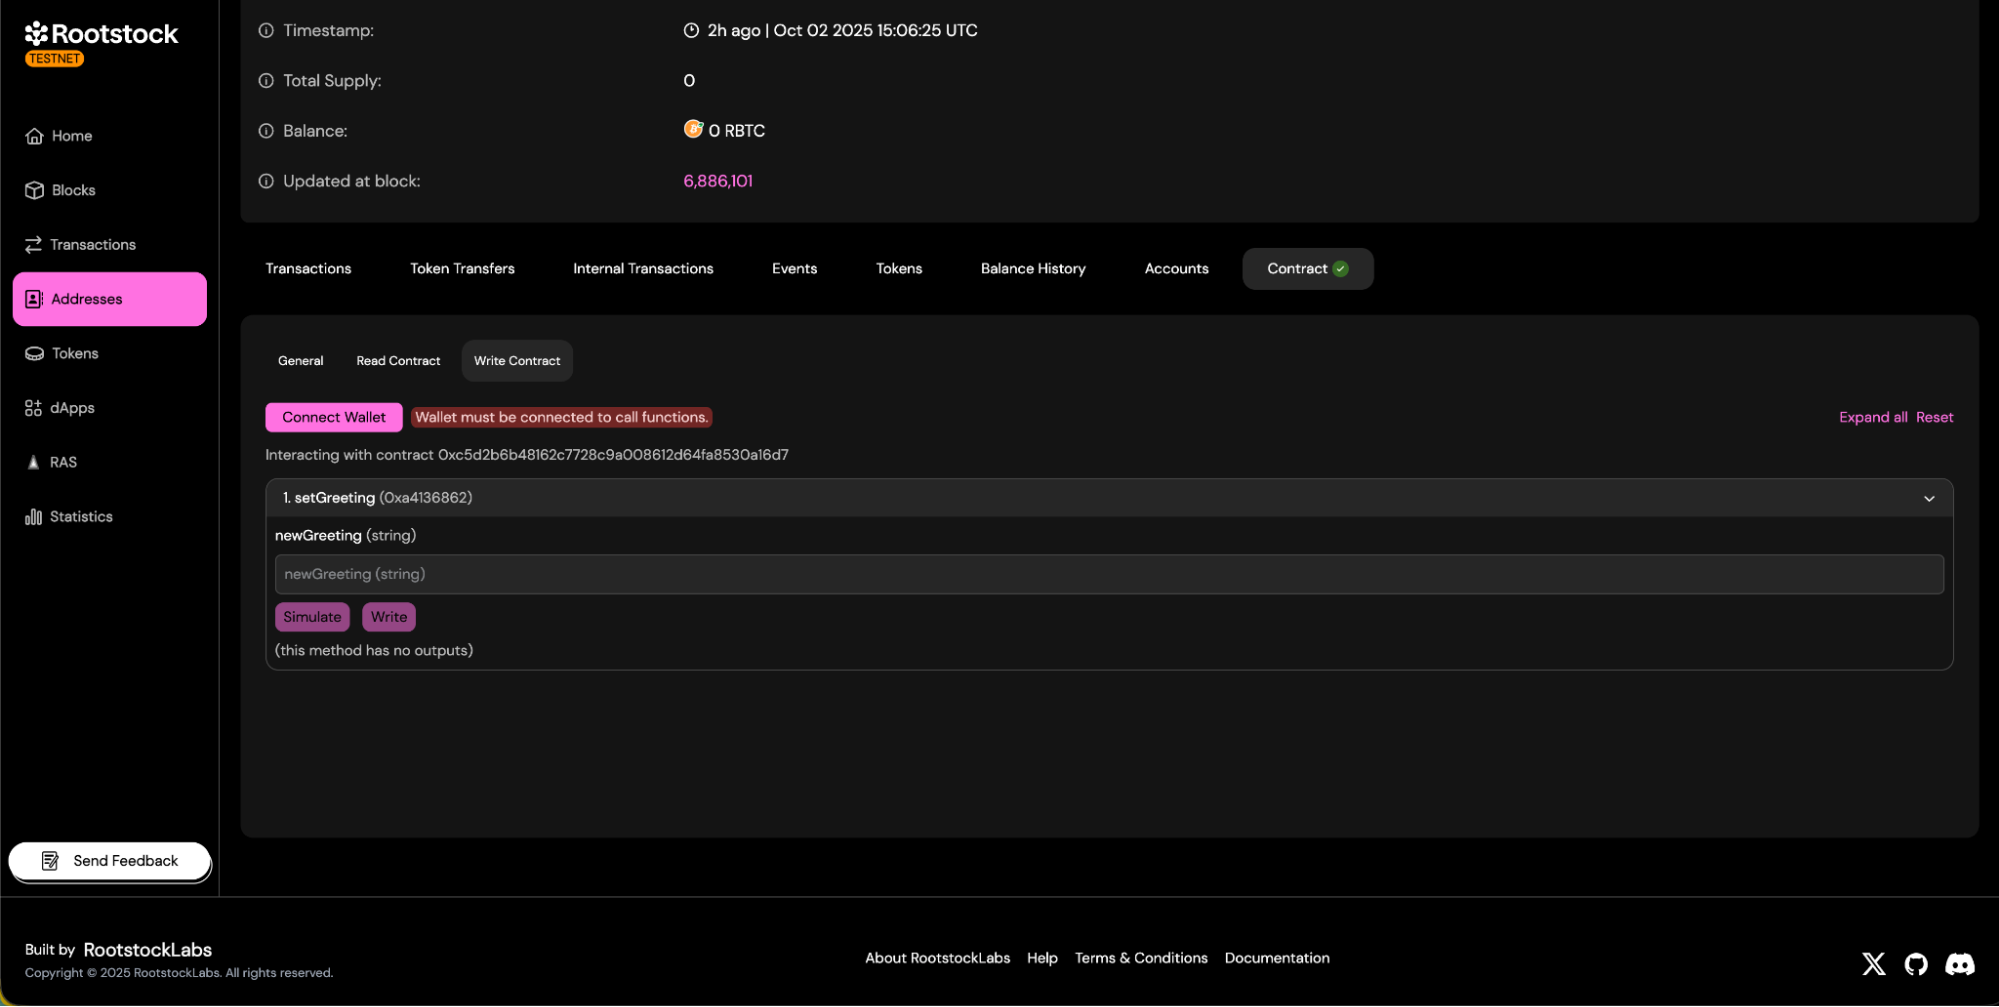
d. Contract read and write panels will be available.
- Read Methods:
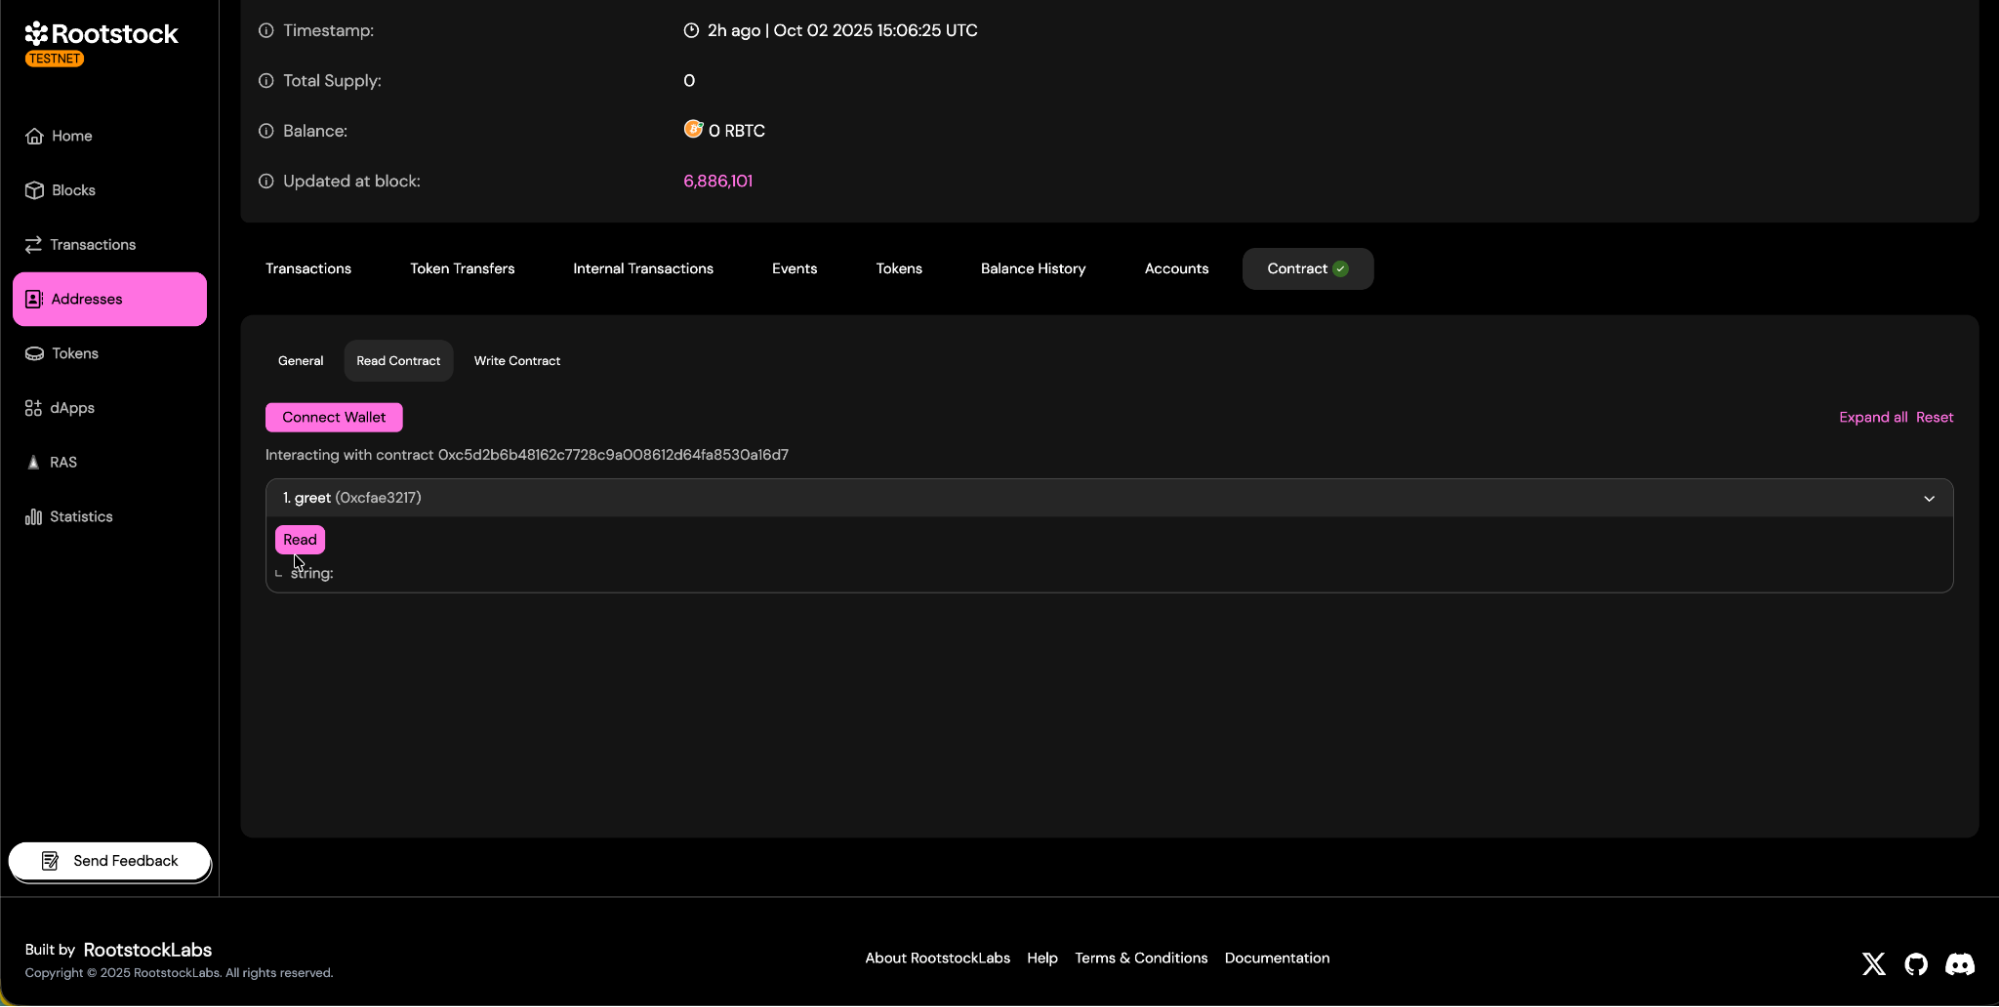
- Write Methods:
- Read Methods:
Troubleshooting
- Here are some common errors and their solutions:
- Confirm the exact Solc version used to compile your contract.
- Retrieve the version from your compilation artifacts.
- Verify the precise encoding, order, and types of your constructor arguments.
- Ensure library names match bytecode placeholders.
- Add the correct deployed addresses for each library.
- Align the number of optimization runs with your compilation settings.
- Consider using the Standard JSON verification method to avoid path or flattening issues.
- Verify the implementation contract.
- Note any proxy-aware UI (if available) and how to link it.
💡 Tip: If verification keeps failing, try matching the compiler settings directly from your Hardhat or Foundry build artifacts.
Resources
- Verify smart contracts using Blockscout or Hardhat Plugin